
Table of Contents
How to Setup IPTV on TiviMate: The Ultimate 2026 Step-by-Step Guide
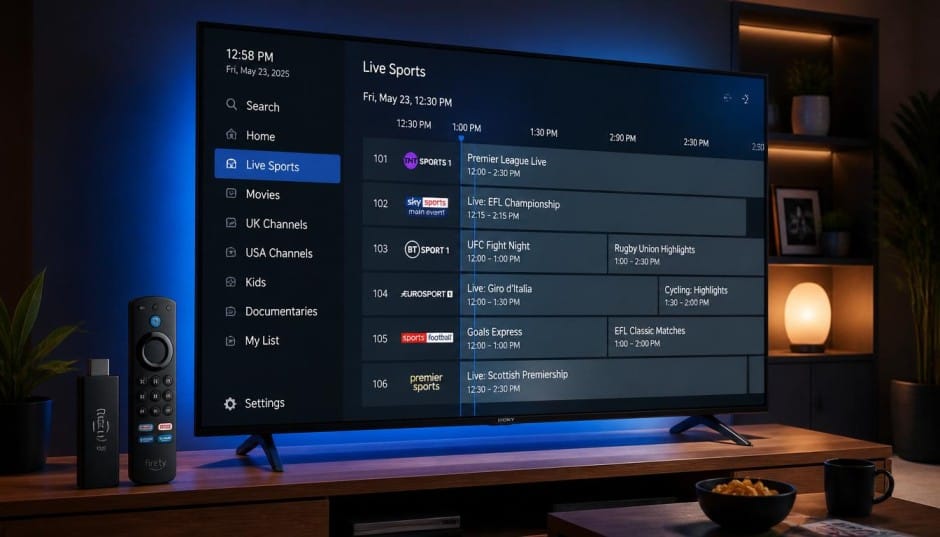
If you are looking for the absolute best way to experience IPTV on your Android TV, Firestick, or Nvidia Shield, TiviMate IPTV Player is the undisputed king. Unlike other basic streaming apps, TiviMate offers a premium, cable-like interface, smooth navigation, and advanced Electronic Program Guide (EPG) management.
However, TiviMate is just a media player—it does not include any channels. To start watching, you need to connect it to a high-quality, stable IPTV provider.
In this comprehensive guide, we will walk you through exactly how to setup IPTV on TiviMate using Xtream Codes API or M3U Playlists, ensuring a buffer-free streaming experience.
💡 Supercharge your TiviMate experience: Don’t test your premium player on a laggy server. Get your high-speed IPTV Free Trial from XT-REMEHDI IPTV today and unlock over 20,000 live premium channels in 4K resolution.
TiviMate Technical Overview
Before we start the setup, here is a quick summary of what you need to know about TiviMate:
| Feature | Details |
| Supported Devices | Firestick, Fire TV, Android TV Boxes, Nvidia Shield, Chromecast with Google TV |
| Recommended Setup Method | Xtream Codes API (Faster loading & better organization) |
| Alternative Method | M3U Playlist URL |
| EPG Support | Yes (Automatic sync) |
| Catch-Up TV Support | Yes (Available on supported premium channels) |
Phase 1: How to Download and Install TiviMate
Because TiviMate is designed strictly for Android-based TV architectures, the installation process varies depending on your device.
Method A: On Official Android TV / Google TV (Nvidia Shield, Sony, Mecool)
- Open the Google Play Store on your TV.
- Search for “TiviMate IPTV Player”.
- Click Install.
Method B: On Amazon Firestick / Fire TV Max
Since the Google Play Store isn’t available on Amazon devices, you need to sideload it using the Downloader app:
- Go to Settings > My Fire TV > Developer Options. (Note: If you don’t see Developer Options, go to About and click your Fire TV Stick name 7 times rapidly to unlock it).
- Turn ON Apps from Unknown Sources.
- Open the Downloader app (available for free in the Amazon Appstore).
- Enter the official TiviMate shortcode or URL (e.g.,
250931or go directly to the official site) to download the latest APK. - Click Install once the download completes.
Phase 2: How to Setup IPTV on TiviMate (Step-by-Step)
Now that you have the app installed, let’s link it to your premium subscription from XT-REMEHDI IPTV. We highly recommend using the Xtream Codes API method because it is much more stable and syncs movies, series, and EPG profiles effortlessly.
Step 1: Launch the App and Add Playlist
When you open TiviMate for the first time, you will be greeted with a clean black screen. Click on the big “Add Playlist” button.
Step 2: Choose Your Connection Type
The app will give you multiple choices:
- M3U playlist
- Xtream Codes
- Stalker Portal
Select Xtream Codes for the cleanest setup.
Step 3: Enter Your XT-REMEHDI IPTV Server Details
When you request a subscription or a trial from our website, you will receive three crucial pieces of data. Input them exactly as shown below:
- Server Address (URL): Enter the premium server URL we sent you.
- Username: Your unique, case-sensitive username.
- Password: Your unique security password.
Make sure to double-check for typos, as 95% of connection errors during setup are due to small typos. Click Next.
Step 4: Name Your Playlist and Finalize
TiviMate will process the server connection and download the channel map. Once done:
- Set a Playlist Name (e.g.,
XT-REMEHDI IPTV). - Click Done.
The app will spend a few moments downloading the live TV layout, movies (VOD), and TV shows.
Phase 3: Setting Up the EPG (TV Guide) on TiviMate
An IPTV player is incomplete without a working TV Guide. One of the best perks of using Xtream Codes with XT-REMEHDI IPTV is that TiviMate will automatically configure your EPG.
- Go to Settings within TiviMate.
- Click on EPG.
- Ensure that the EPG Source is active and pointing to your main playlist link.
- Set the Update Interval to “Once a Day” so your guide is always accurate and updated with current schedules.
Pro Tips to Stop Buffering on TiviMate
If you experience lagging or buffering during live sports matches, the problem might not be the app or the server, but your local settings. Follow these quick optimization tweaks:
1. Increase the Buffer Size
By default, TiviMate keeps a very small data buffer. If your internet connection dips for a microsecond, the stream freezes.
- Go to Settings > Playback > Buffer Size.
- Change it from None to Medium or Large. This creates a small safety cache of video data to prevent interruptions.
2. Switch to Hardware Decoding
Ensure your hardware processor is handling the video format properly:
- Go to Settings > Playback.
- Verify that Video Decoder and Audio Decoder are set to Hardware.
3. Use an Ethernet Cable
4K streams require high bandwidth stability. While Wi-Fi is convenient, switching your Firestick or TV box to a wired Ethernet LAN connection drops latency drastically, resulting in instant zapping speeds.
Frequently Asked Questions (FAQ)
Why is TiviMate not showing my movies or series?
The free version of TiviMate only unlocks Live TV. To access the built-in VOD sections, multi-screen modes, and custom channel ordering, you need to upgrade to TiviMate Premium via the TiviMate Companion app on the Google Play store.
Can I use TiviMate on my Samsung or LG Smart TV?
No. TiviMate is built specifically for Android TV architecture (Tizen OS for Samsung and webOS for LG cannot run Android APKs). If you own an LG or Samsung TV, we recommend using apps like IBO Player or Smart IPTV instead.
Do I need a VPN for TiviMate?
While our premium servers are highly secure and bypass most blocks, some internet service providers (ISPs) in the UK and Europe throttle heavy streaming traffic during peak times (like weekend live games). Using a reliable VPN can completely hide your traffic from your ISP and stabilize your connection.
Elevate Your Entertainment
TiviMate is a masterpiece of software, but it requires a powerhouse engine to run perfectly. Don’t compromise your viewing experience with cheap, overloaded lines that freeze every 10 seconds.
Experience true high-definition television. Visit XT-REMEHDI IPTV today, request your premium access details, and transform your TiviMate setup into a world-class streaming theater right now!
Wakha khoya, nkemlo l-khidma bach n-raj3o had l-article mega-guide s7i7 w t-tla3 fih l-Density d l-keywords mzyana w pro f Google.
Hahwa l-Khilal d l-maqal (Advanced Sections + FAQ Expansion) bach n-ziydou l-Value d l-content:
Phase 4: Advanced TiviMate Features You Should Test
Once your basic XT-REMEHDI IPTV line is running, TiviMate unlocks several premium features that completely change how you watch television. During your setup or trial period, make sure to explore these functionalities:
1. Multi-Screen Mode (Watch Up to 4 Channels at Once)
For sports fans, this is the ultimate feature. If there are multiple English Premier League or Champions League matches happening at the same time, TiviMate allows you to split your screen.
- While watching a live channel, press the Select/Center button on your remote.
- Scroll down and select “Multi-screen”.
- Click “Add channel” to choose another stream from your playlist.
- Note: To stream 2 or more channels smoothly at the exact same time, make sure your internet bandwidth is above 50 Mbps and that your IPTV provider supports multi-room connections.
2. Creating Custom Favorites Lists
With over 20,000 channels available on our servers, navigating the list can take time. TiviMate allows you to build a clean, personalized folder:
- Highlight your favorite channel in the TV Guide (EPG).
- Press and hold the Select button on your remote until a side menu appears on the right.
- Click “Add to Favorites”.
- Now, you can access all your top premium channels instantly from the “Favorites” category at the very top of your app.
Phase 5: Managing TiviMate Premium via Companion App
Many users get confused when trying to unlock the premium features of TiviMate on an Amazon Firestick. Because the Firestick does not have the Google Play Store, you cannot pay for the premium license directly on the device.
Here is the exact workaround to activate it:
- Use an Android Phone or Tablet: Download the free “TiviMate Companion” app from the Google Play Store on any separate Android mobile device.
- Create an Account: Open the Companion app, register with your email, and create a secure password.
- Purchase the Subscription: Choose either the yearly subscription or the lifetime one-time payment. This license allows you to activate up to 5 devices simultaneously.
- Log In on Your Firestick: Go back to your TV, open TiviMate, go to Settings > Unlock Premium, and log in with the exact same account details you created on the Companion app.
Troubleshooting TiviMate Error Codes
If something goes wrong during or after your how to setup IPTV on TiviMate process, the app will usually display a specific message. Here is what those codes actually mean and how to resolve them instantly:
Error: “An error occurred: Code 401”
- What it means: Unauthorized Access.
- How to fix it: This means the server rejected your login credentials. Check your username and password for capital letters, symbols, or missing characters. If the issue persists, contact XT-REMEHDI IPTV support to verify if your trial or subscription line is fully activated on the server backend.
Error: “An error occurred: Code 403”
- What it means: Forbidden or Access Denied.
- How to fix it: This often happens if your provider has locked your subscription to a specific IP address or country, or if you are trying to use a MAC address playlist on an M3U protocol setup. Ensure your VPN is set to the correct country or turn it off entirely to see if the connection clears up.
Error: “An error occurred: Code 500” or “DataSourceException”
- What it means: Internal Server Error or Timeout.
- How to fix it: The player is struggling to reach the streaming server. This can happen during temporary server maintenance or if your local ISP is aggressively blocking the IPTV portal link. Restarting your router or turning on a premium VPN (like ExpressVPN or NordVPN) usually bypasses this issue immediately.
Detailed Comparison: Why TiviMate Beats Other Players
If you are still wondering why you should spend time configuring TiviMate instead of using a simpler app like IPTV Smarters, here is a direct comparison based on user experience and speed performance:
| Feature Criteria | TiviMate IPTV Player | IPTV Smarters Pro |
| Interface Aesthetic | Premium Cable/Satellite Layout | Grid-Based App Layout |
| Zapping Latency | Ultra-Fast (Under 1.5 seconds) | Average (3-4 seconds) |
| EPG Auto-Sync | Flawless & Automatic | Requires Manual Refresh Often |
| Navigation Speed | Extremely lightweight on Firestick | Can feel heavy/sluggish on older sticks |
| Multi-Screen Function | Advanced (Up to 4 screens) | Basic Layout Only |
Final Words: Never Miss a Single Frame
Setting up your entertainment setup correctly is the difference between an evening of frustrating lag and a perfect, theater-like viewing experience in your living room. By choosing TiviMate as your dedicated media player and linking it to the high-performance infrastructure of XT-REMEHDI IPTV, you are building the ultimate premium setup available in 2026.
Don’t wait around for cable bills to go up again. Take action, follow this step-by-step tutorial, and jump right into world-class streaming today.
🚀 Ready to launch? Click below to get your instant login codes and start your streaming adventure right now:
Phase 6: How to Fix EPG (TV Guide) Not Loading on TiviMate
Sometimes, even after a successful setup, you might open your TV guide and see “No Information” on all channels. This is a common bug that happens if the app’s cache gets corrupted or if the sync time is misaligned.
Follow these advanced steps to force TiviMate to reload the guide from the XT-REMEHDI IPTV servers:
- Go to Settings > EPG.
- Click on EPG Sources.
- Select your main playlist source and click Update EPG.
- If that doesn’t work, clear the app cache: Go to your device settings (e.g., Firestick Settings > Applications > Manage Installed Applications > TiviMate) and click Clear Cache (Do NOT click Clear Data, or you will lose your login details).
- Re-open TiviMate, and the full program guide will download fresh from the link.
Phase 7: How to Backup and Restore Your TiviMate Settings
Once you spend time setting up your favorite folders, renaming channels, and configuring your EPG layout, the last thing you want is to lose all that hard work if your device crashes or if you buy a new Firestick for another room.
TiviMate includes a powerful Backup & Restore feature that allows you to copy your exact setup onto multiple devices instantly:
Creating a Backup:
- Navigate to Settings > General.
- Scroll down and click on Backup Data.
- Choose a storage folder on your device (or an external USB drive plugged into your Android box).
- Name the backup file (e.g.,
tivimate-backup-2026) and click Save.
Restoring data on a New Device:
- Install TiviMate on your second Firestick or Android TV.
- Transfer the backup file via a local network sharing app (like Send Files to TV) or a USB drive.
- Open TiviMate, go to Settings > General > Restore Data.
- Select your backup file, and your entire profile—including your XT-REMEHDI IPTV lines and customized favorites folders—will load in less than 5 seconds.
Phase 8: Recording Live Streams Using TiviMate
Yes, TiviMate allows you to record live television, such as late-night sports matches or pay-per-view events, so you can watch them later. However, because it’s a lightweight application running on a streaming stick, you must configure it properly to avoid failure codes.
Requirements for Stable Recording:
- Multi-Room Subscription: Recording a channel requires an active connection stream. If you try to record one channel while watching another, your line will buffer or trigger an error unless you have a multi-connection plan from XT-REMEHDI IPTV.
- External Storage: Devices like the Amazon Firestick only have 8GB of total storage, which can fill up with just 30 minutes of 4K recording. We highly recommend connecting an OTG cable with a USB flash drive formatted to FAT32 to store your recordings safely.
How to Schedule a Recording:
- Open the TV Guide (EPG) and find the show or match you want to save.
- Highlight the program and press and hold the Select button on your remote.
- Click on Custom Recording or Record from the side panel.
- Set the padding time (e.g., add 10 minutes to the end of a football match in case of extra time) and click Save.